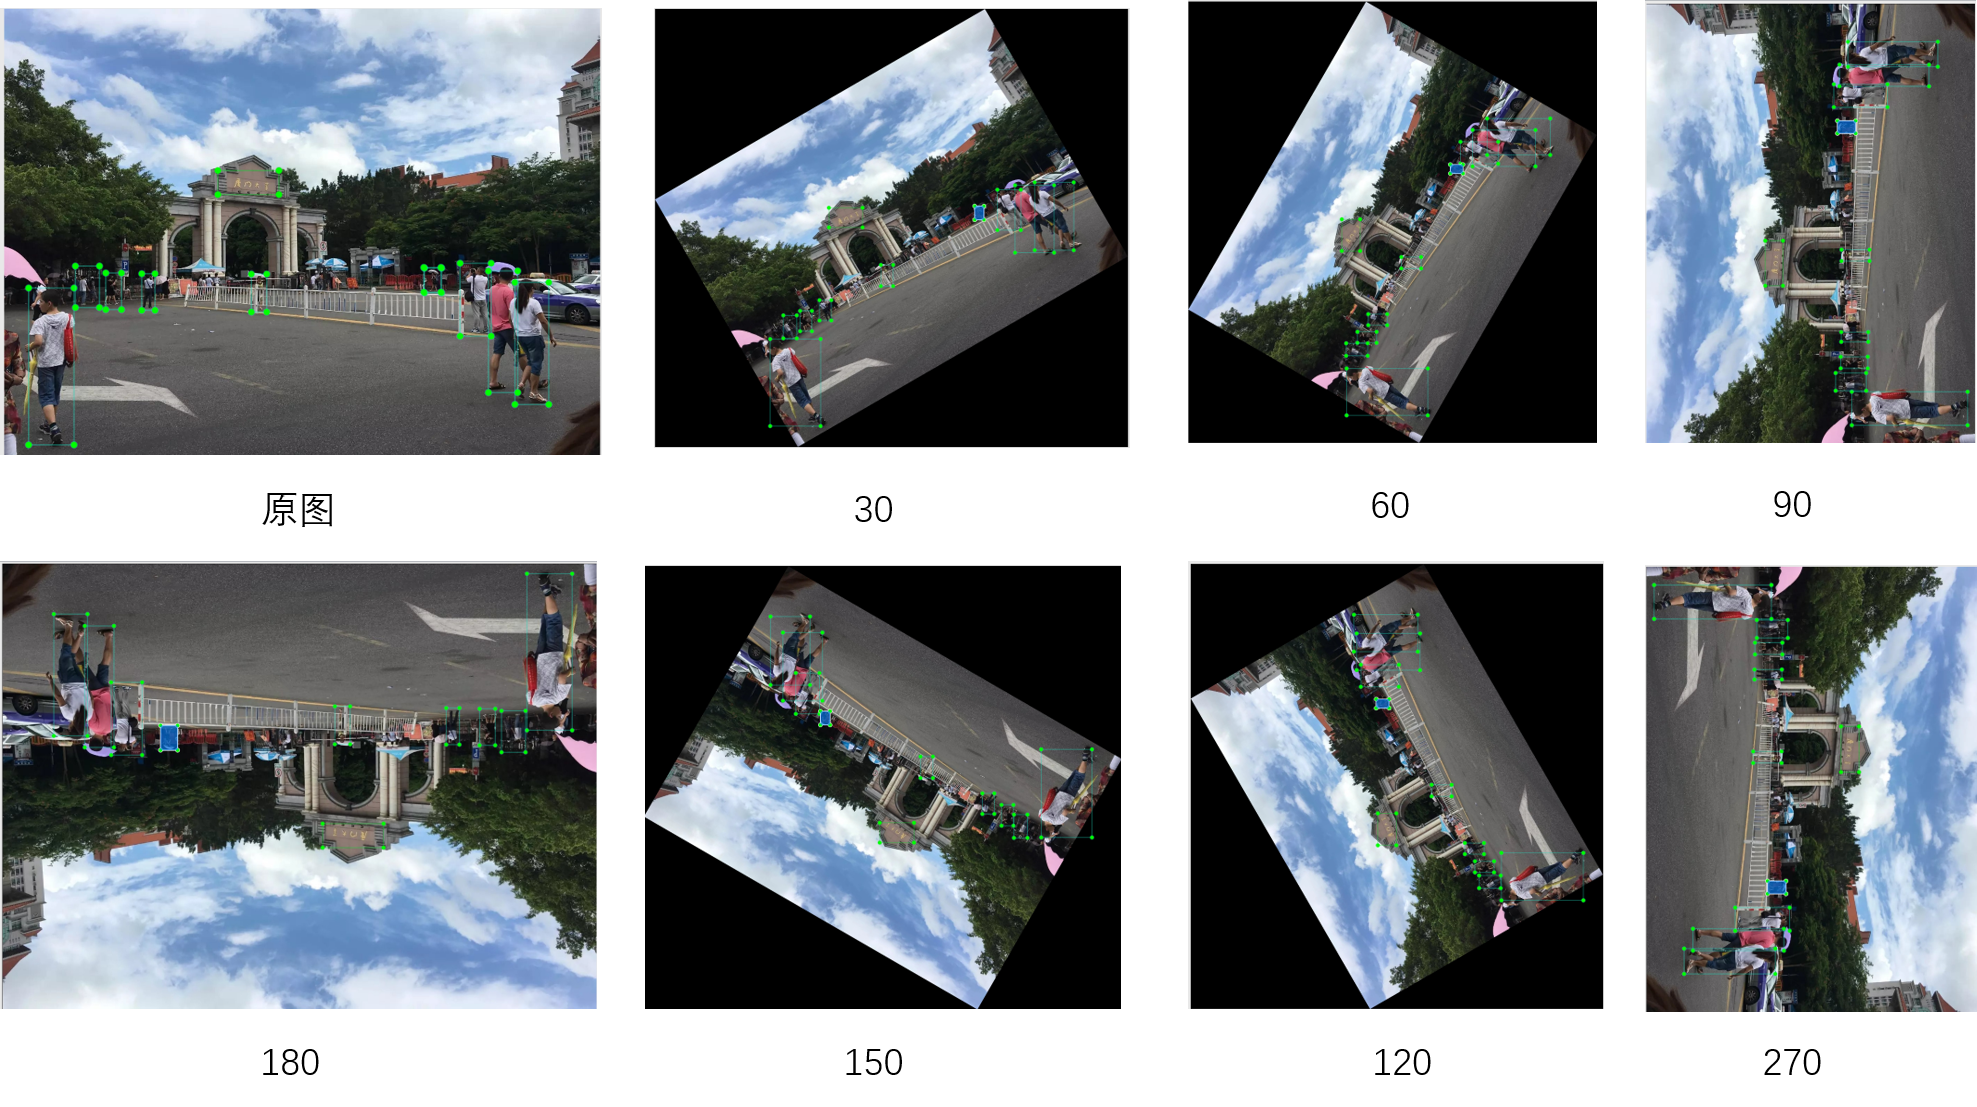
目标检测数据集扩充
数据扩充对于深度神经网络训练通常具有良好的作用,例如2003年Patrice Simard等人所著的一篇论文中他们把MNIST手写数字数据集通过旋转,转换和扭曲进行扩展。通过在这个扩展后的数据集上的训练,他们把MNIST手写数字识别的准确率提升到了98.9%。然后还在“弹性扭曲”的数据集上进行了实验,这是一种特殊的为了模仿手部肌肉的随机抖动的图像扭曲方法。通过使用弹性扭曲扩展的数据,他们最终达到了99.3%的分类准确率。
如果人为扩充的数据集对准确度有提高,则扩展是良性的,说明我们对数据所做的拓展操作是良性的,能够“反映真实世界的变化”,就会被用到整个数据集的扩展。如果扩充数据集对准确度有降低,则说明不能用该操作进行拓展。
扩充方法
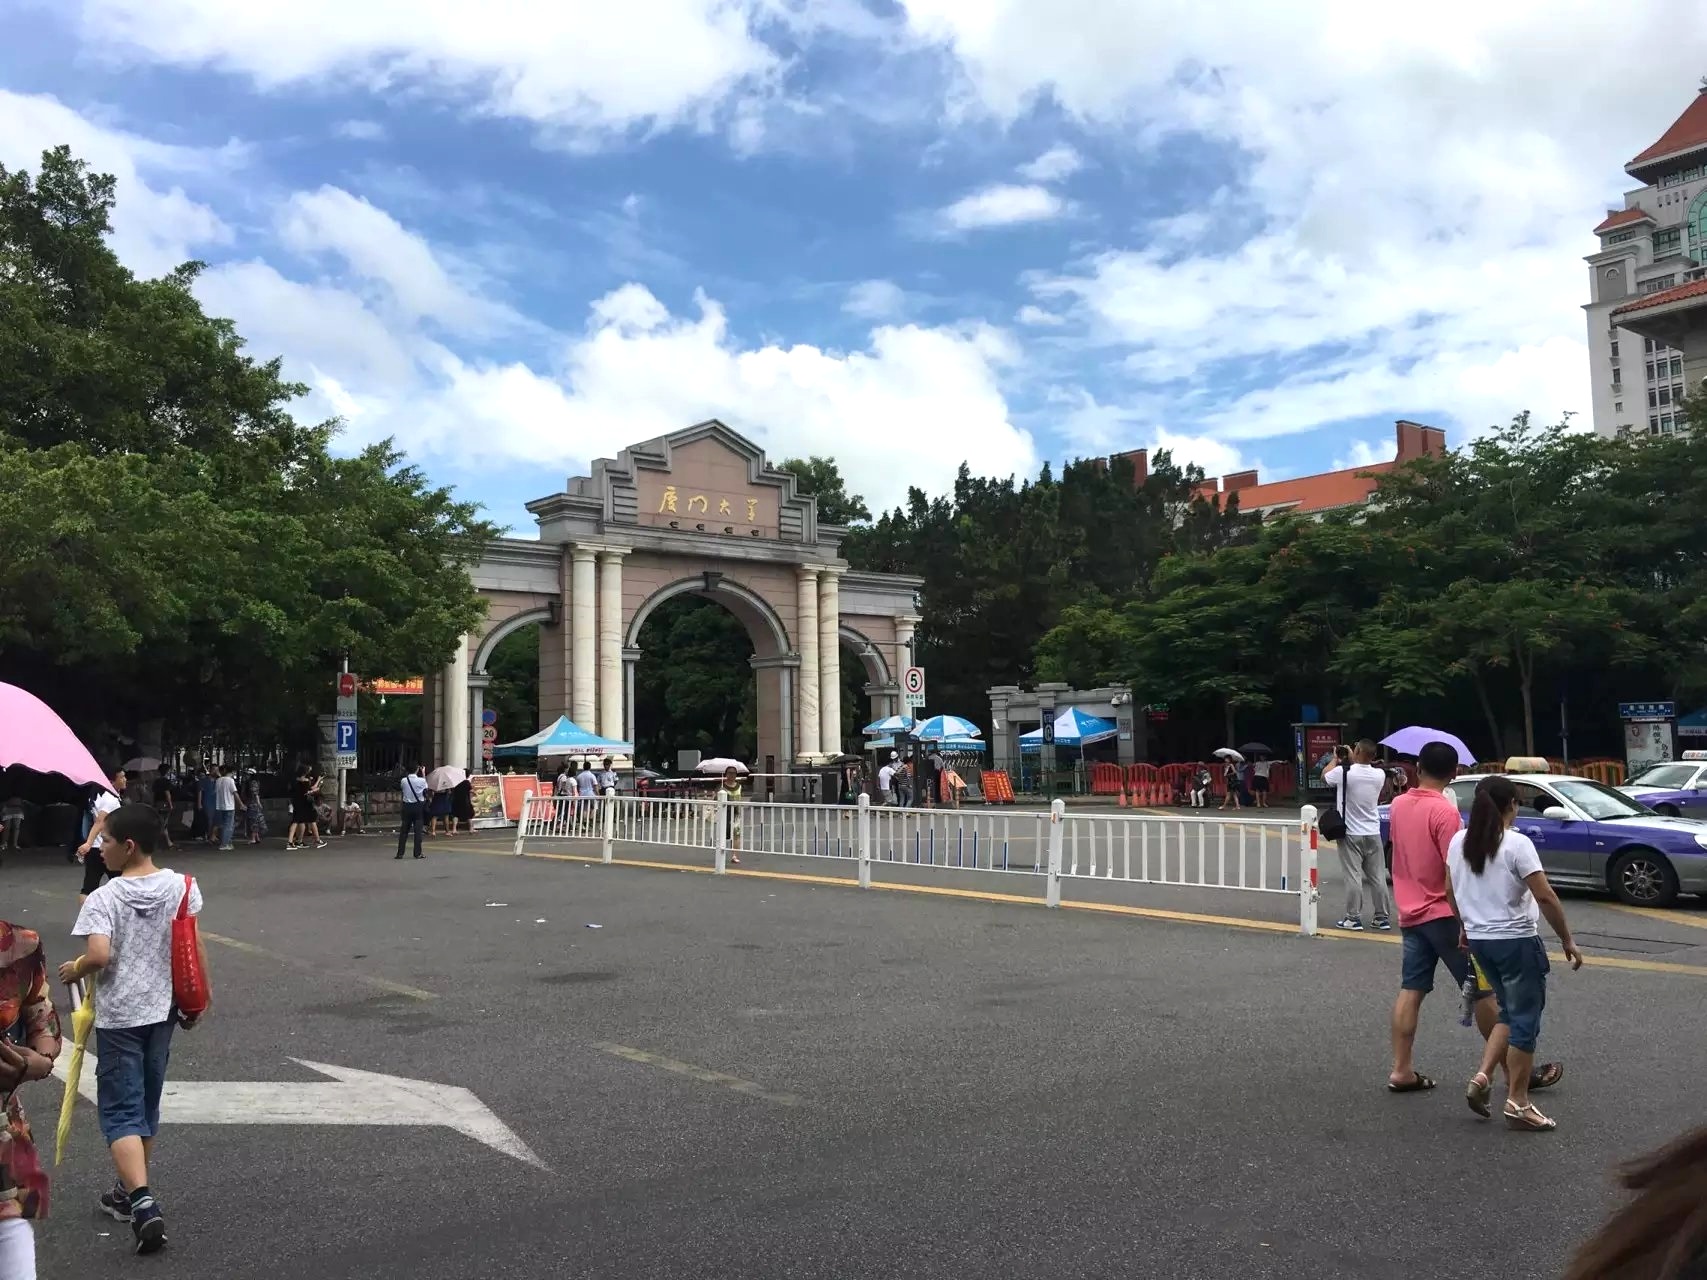
原图

图像强度变换
亮度变化
调亮
def brightness(img):
    img = Image.fromarray(img)

    brightness = 1 + np.random.randint(1, 9) / 10
    brightness_img = img.point(lambda p: p * brightness)

    return Image.fromarray(np.uint8(brightness_img))
调暗
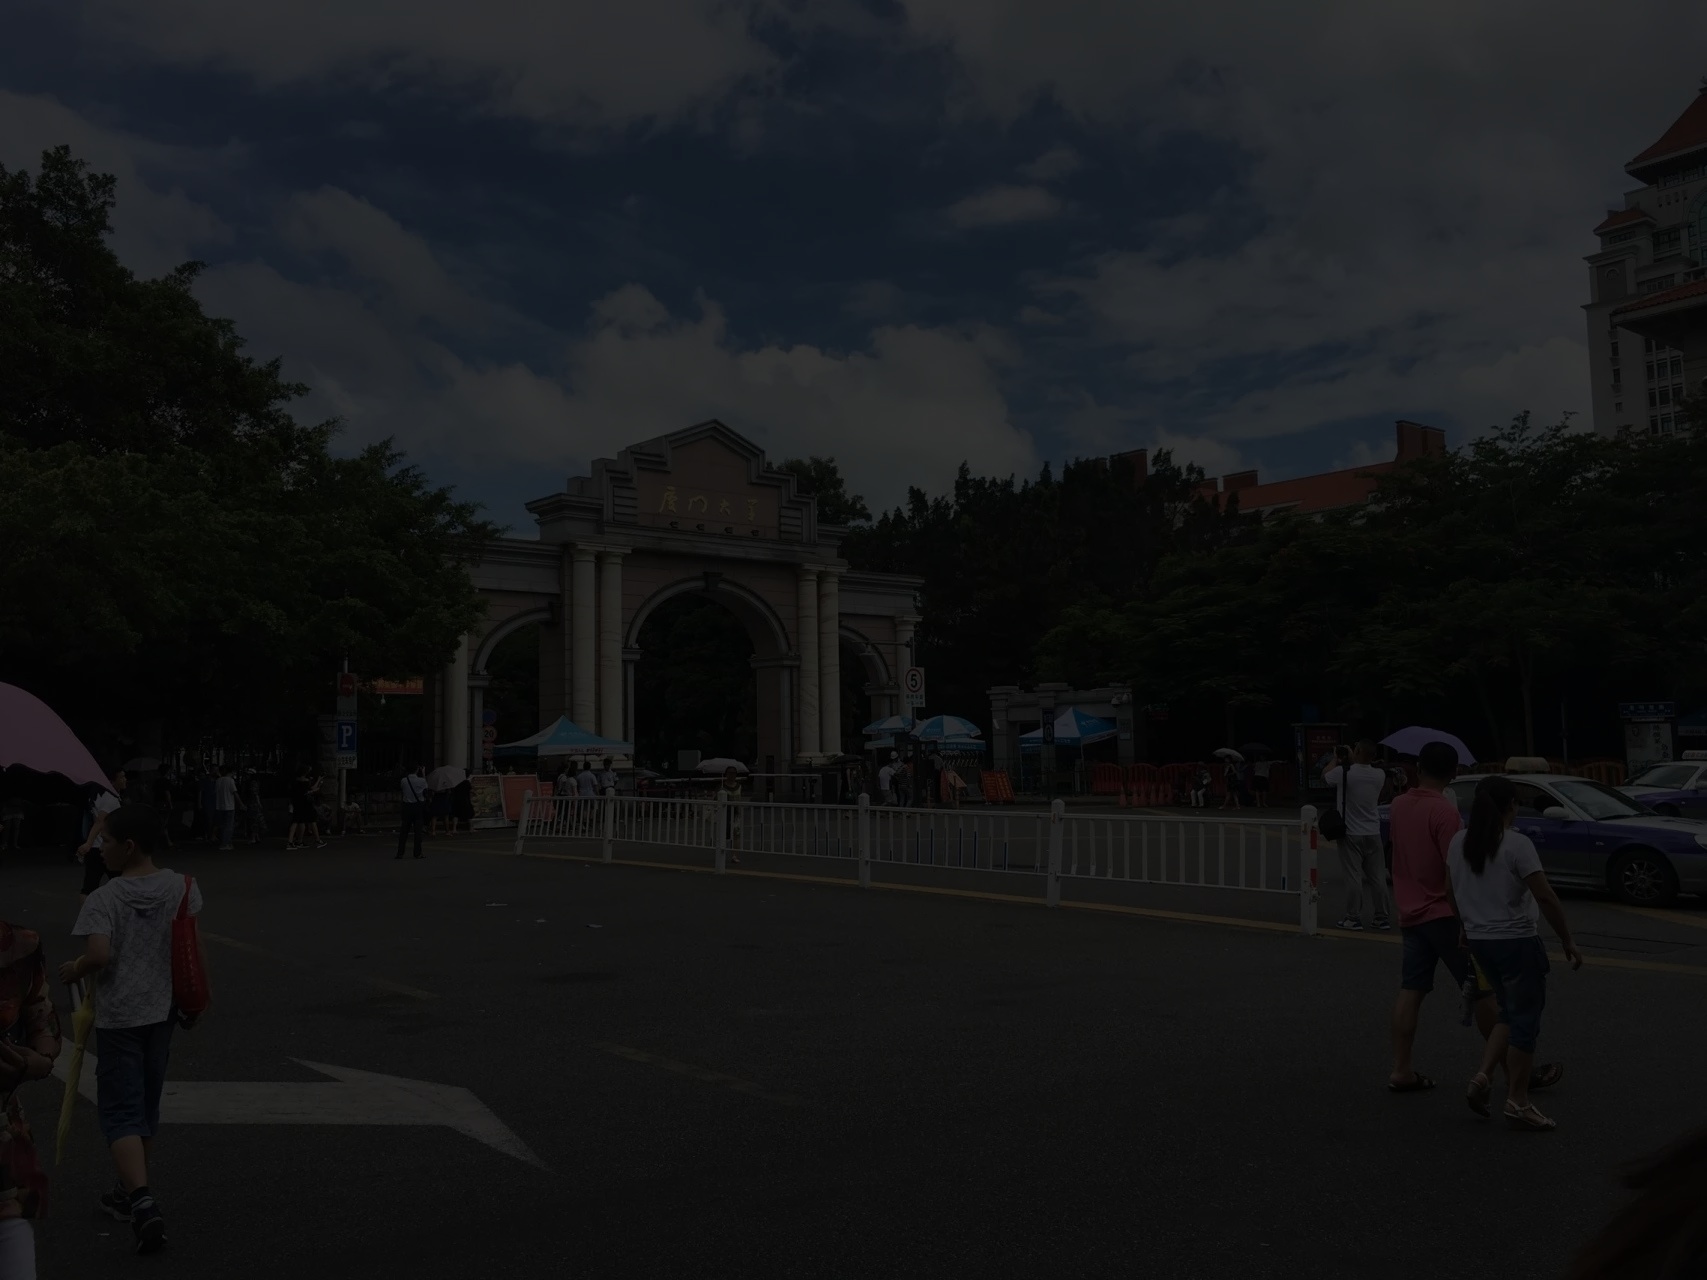
def darkness(img):
    darkness = np.random.randint(1, 9) / 10
    darkness_img = img * darkness
    return Image.fromarray(np.uint8(darkness_img))
对比度变化
扩展图像灰度级动态范围,对两极的像素进行压缩,对中间范围的像素进行扩展
def contrast(img):
    img = Image.fromarray(img)
    range_contrast=(-50, 50)

    contrast = np.random.randint(*range_contrast)

    contrast_img = img.point(lambda p: p * (contrast / 127 + 1) - contrast)

    return Image.fromarray(np.uint8(contrast_img))
不影响label的位置
图像滤波
锐化
def sharpen(img):
    img = cv2.cvtColor(np.asarray(img),cv2.COLOR_RGB2BGR)

    identity = np.array([[0, 0, 0],
                        [0, 1, 0],
                        [0, 0, 0]])
    sharpen = np.array([[ 0, -1,  0],
                        [-1,  4, -1],
                        [ 0, -1,  0]]) / 4
    max_center = 4

    sharp = sharpen * np.random.random() * max_center
    kernel = identity + sharp

    sharpen_img = cv2.filter2D(img, -1, kernel)
    return Image.fromarray(cv2.cvtColor(sharpen_img,cv2.COLOR_BGR2RGB))
不影响label的位置

高斯模糊
def blur(img):
    img = cv2.cvtColor(np.asarray(img),cv2.COLOR_RGB2BGR)

    kernel_size = (7, 7)
    blur_img = cv2.GaussianBlur(img,kernel_size,0)

    return Image.fromarray(cv2.cvtColor(blur_img,cv2.COLOR_BGR2RGB))

def saveBlurLabel(name):
    shutil.copyfile(name + ".txt", name + "_blur.txt")
不影响label的位置

镜像翻转
图像左右翻转
def flip(img):
    flip_img = cv2.flip(cv2.cvtColor(np.asarray(img), cv2.COLOR_RGB2BGR), 1)

    return Image.fromarray(cv2.cvtColor(flip_img, cv2.COLOR_BGR2RGB))
第一个位置的参数 pos = 1 - pos,其他信息不变,可以采用脚本自动生成
def saveFlipLabel(name):
    with open(name + "_flip.txt", "w") as outfile:
        with open(name + ".txt", "r") as infile:
            for line in infile.readlines():
                words = line.split(" ")
                horizontal_coord = float(words[1])
                outfile.write(
                    words[0] + " " + str(format(1 - horizontal_coord, ".6f")) + " " + words[2] + " " + words[3] + " " +
                    words[4])
图片裁剪
裁剪原图80%大小的中心图像,并进行随机移动
def crop(img):
    size = img.shape[:2]
    kernel_size = list(map(lambda x: int(x*0.8), size))
    shift_min, shift_max = -50, 50
    shift_size = [np.random.randint(shift_min, shift_max), np.random.randint(shift_min, shift_max)]

    crop_img = img[
        (size[0]-kernel_size[0])//2+shift_size[0]:(size[0]-kernel_size[0])//2+kernel_size[0]+shift_size[0],
        (size[1]-kernel_size[1])//2+shift_size[1]:(size[1]-kernel_size[1])//2+kernel_size[1]+shift_size[1]
    ]

    return Image.fromarray(np.uint8(crop_img))
可能将目标对象裁减掉,因此采用手工重新标注
图形拉伸
拉伸为正方形
def deform(img):
    img = Image.fromarray(img)
    w, h = img.size[:2]

    # 拉伸成宽为w的正方形
    deform_img = img.resize((int(w), int(w)))

    return deform_img
原图中比例信息改变,最好重新手工标注
镜头畸变
对图像进行透视变化,模拟鱼眼镜头的镜头畸变
通过播放径向系数k1,k2,k3和切向系数p1,p2实现
def distortion(img):
    d_coef= np.array((0.15, 0.15, 0.1, 0.1, 0.05))

    # get the height and the width of the image
    h, w = img.shape[:2]

    # compute its diagonal
    f = (h ** 2 + w ** 2) ** 0.5

    # set the image projective to carrtesian dimension
    K = np.array([[f, 0, w / 2],
                  [0, f, h / 2],
                  [0, 0,   1  ]])

    d_coef = d_coef * np.random.random(5) # value
    d_coef = d_coef * (2 * (np.random.random(5) < 0.5) - 1) # sign

    # Generate new camera matrix from parameters
    M, _ = cv2.getOptimalNewCameraMatrix(K, d_coef, (w, h), 0)

    # Generate look-up tables for remapping the camera image
    remap = cv2.initUndistortRectifyMap(K, d_coef, None, M, (w, h), 5)

    # Remap the original image to a new image
    distortion_img = cv2.remap(img, *remap, cv2.INTER_LINEAR)

    return Image.fromarray(np.uint8(distortion_img))
最好重新手工标注
加入噪声
椒盐噪声
def addNoise(img):
    rows,cols,dims = img.shape
    noise_img = img
    for i in range(5000):
        x = np.random.randint(0,rows)
        y = np.random.randint(0,cols)
        noise_img[x,y,:] = 255
    noise_img.flags.writeable = True  # 将数组改为读写模式

    return Image.fromarray(np.uint8(noise_img))

def saveNoiseLabel(name):
    shutil.copyfile(name + ".txt", name + "_noise.txt")
标记不变

渐晕
def vignetting(img):
    ratio_min_dist=0.2
    range_vignette=np.array((0.2, 0.8))
    random_sign=False

    h, w = img.shape[:2]
    min_dist = np.array([h, w]) / 2 * np.random.random() * ratio_min_dist

    # create matrix of distance from the center on the two axis
    x, y = np.meshgrid(np.linspace(-w/2, w/2, w), np.linspace(-h/2, h/2, h))
    x, y = np.abs(x), np.abs(y)

    # create the vignette mask on the two axis
    x = (x - min_dist[0]) / (np.max(x) - min_dist[0])
    x = np.clip(x, 0, 1)
    y = (y - min_dist[1]) / (np.max(y) - min_dist[1])
    y = np.clip(y, 0, 1)

    # then get a random intensity of the vignette
    vignette = (x + y) / 2 * np.random.uniform(*range_vignette)
    vignette = np.tile(vignette[..., None], [1, 1, 3])

    sign = 2 * (np.random.random() < 0.5) * (random_sign) - 1
    vignetting_img = img * (1 + sign * vignette)

    return Image.fromarray(np.uint8(vignetting_img))

def saveVignettingLabel(name):
    shutil.copyfile(name + ".txt", name + "_vignetting.txt")
对图像添加一个圆范围内的噪声模拟光晕
标签不变
其他
随机丢包
def cutout(img):
    min_size_ratio, max_size_ratio = 0.1, 0.3
    channel_wise = False
    max_crop = 4
    replacement=0

    size = np.array(img.shape[:2])
    mini, maxi = min_size_ratio * size, max_size_ratio * size
    cutout_img = img
    for _ in range(max_crop):
        # random size
        h = np.random.randint(mini[0], maxi[0])
        w = np.random.randint(mini[1], maxi[1])
        # random place
        shift_h = np.random.randint(0, size[0] - h)
        shift_w = np.random.randint(0, size[1] - w)

        if channel_wise:
            c = np.random.randint(0, img.shape[-1])
            cutout_img[shift_h:shift_h+h, shift_w:shift_w+w, c] = replacement
        else:
            cutout_img[shift_h:shift_h+h, shift_w:shift_w+w] = replacement

    return Image.fromarray(np.uint8(cutout_img))

def saveCutoutLabel(name):
    shutil.copyfile(name + ".txt", name + "_cutout.txt")
不影响label的位置
参考:
代码
详见:github.com